Global Optimization using Response Surfaces
For the optimization of flow-exposed products, CAESES® offers a set of strategies that allows users to automate the intelligent design creation process. Design variables are linked to the variable geometry and get controlled by algorithms that are called design engines. Besides some standard engines for parameter studies and optimizations, CAESES® offers an additional method set of advanced strategies based on the optimization package Dakota. In particular, so-called Response Surface Methods (RSM) — i.e. approximation models of an expensive high-fidelity model — are fully integrated and easy to apply in the design process. This short article shows you how to run such an RSM optimization in CAESES®.
Design Variables and Objective Functions
First of all, you have to create some design variables in your CAD model or CFD setup. Objective functions can be defined by using results from a CFD simulation. The software connector in CAESES® connects any external tool including the result data for the definition of an objective function.
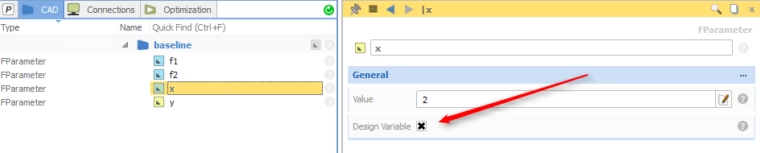
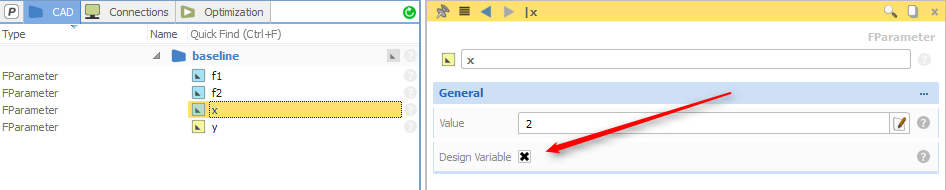
Create design variables and objective functions in your CAESES project
Design Engine
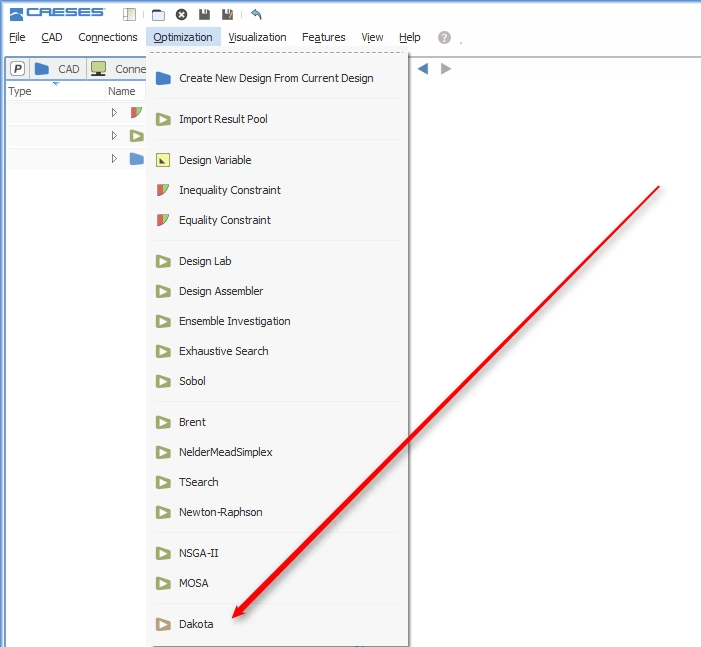
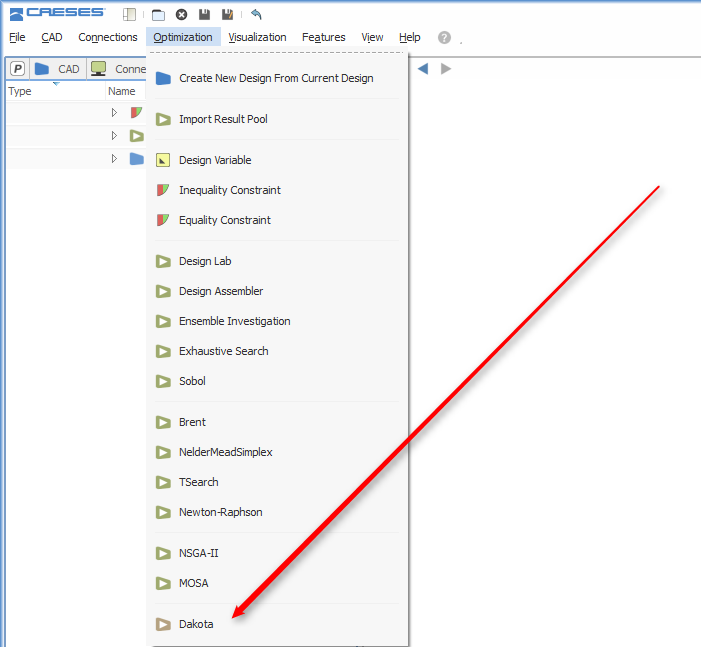
All optimization strategies in CAESES® are listed in the “optimization” menu. Choose the Dakota engine at the bottom which creates a new design engine in the tree.
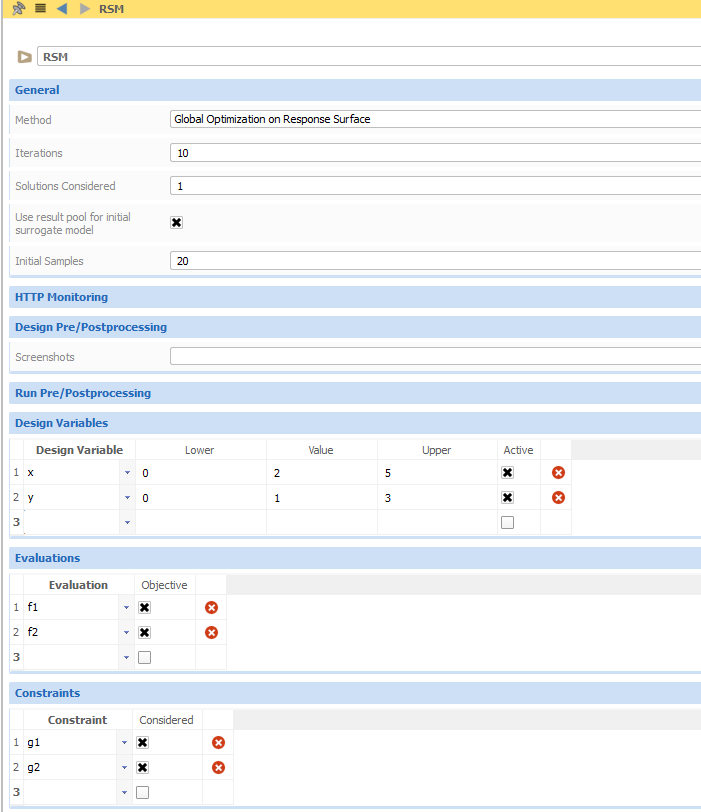
Now you have to choose “Global Optimization on Response Surface” as method. Similar to all other engines in CAESES®, you have to configure your design variable ranges and you need to select one or several objective functions as well as optional inequality/equality constraints. The following screenshot shows such a setup:
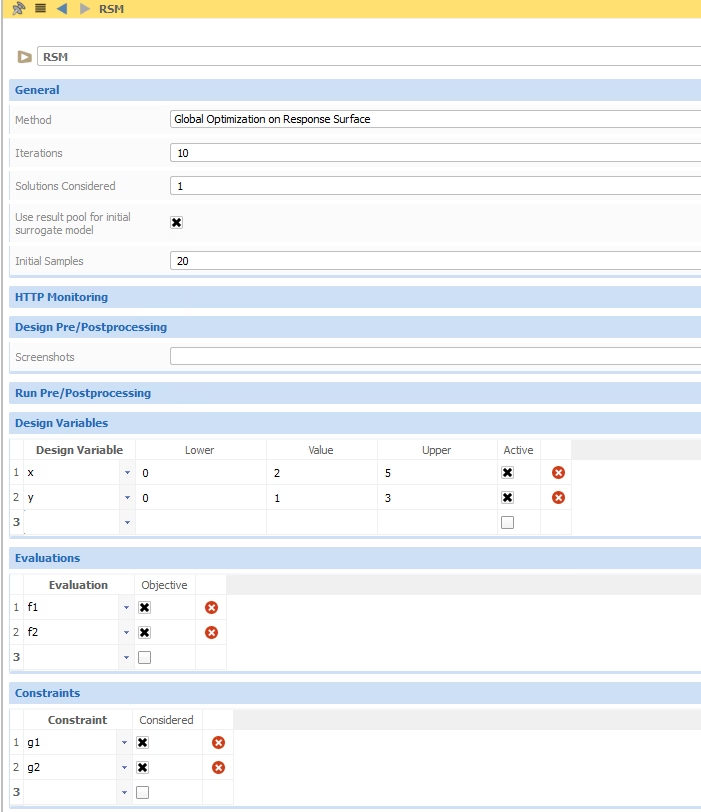
Optimization on a Response Surface
In order to understand the strategy-specific settings, we briefly have to explain what the method actually does as soon as we start it:
In the first phase, a set of random samples is generated and used for creating the initial response surface. These samples can also be taken from previous runs or a sensitivity analysis and CAESES® offers a result pool functionality to recycle them. In most cases, these samples are design candidates for which full CFD simulations are triggered.
Now in the next phase, the internal optimization is started: A genetic algorithm is run on the response surface, to find the global optimum on this initial surrogate model. Since there can be several optimum designs, the user controls how many of the best design candidates should be picked from the Pareto Front (for multi-objective tasks; otherwise it is simply 1 solution). We labeled this input “Solutions Considered” in the picture above. These best designs are evaluated with CFD again in the next step, and the results are transferred back as information to the response surface. This approximation model gets then regenerated by using the new data base and hence steadily improves its quality during each iteration.
Result Assessment
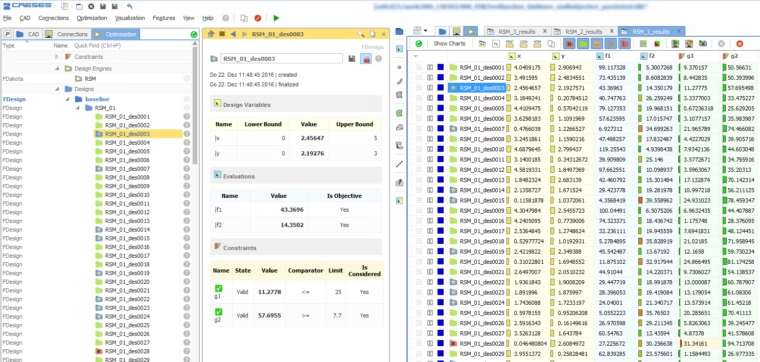
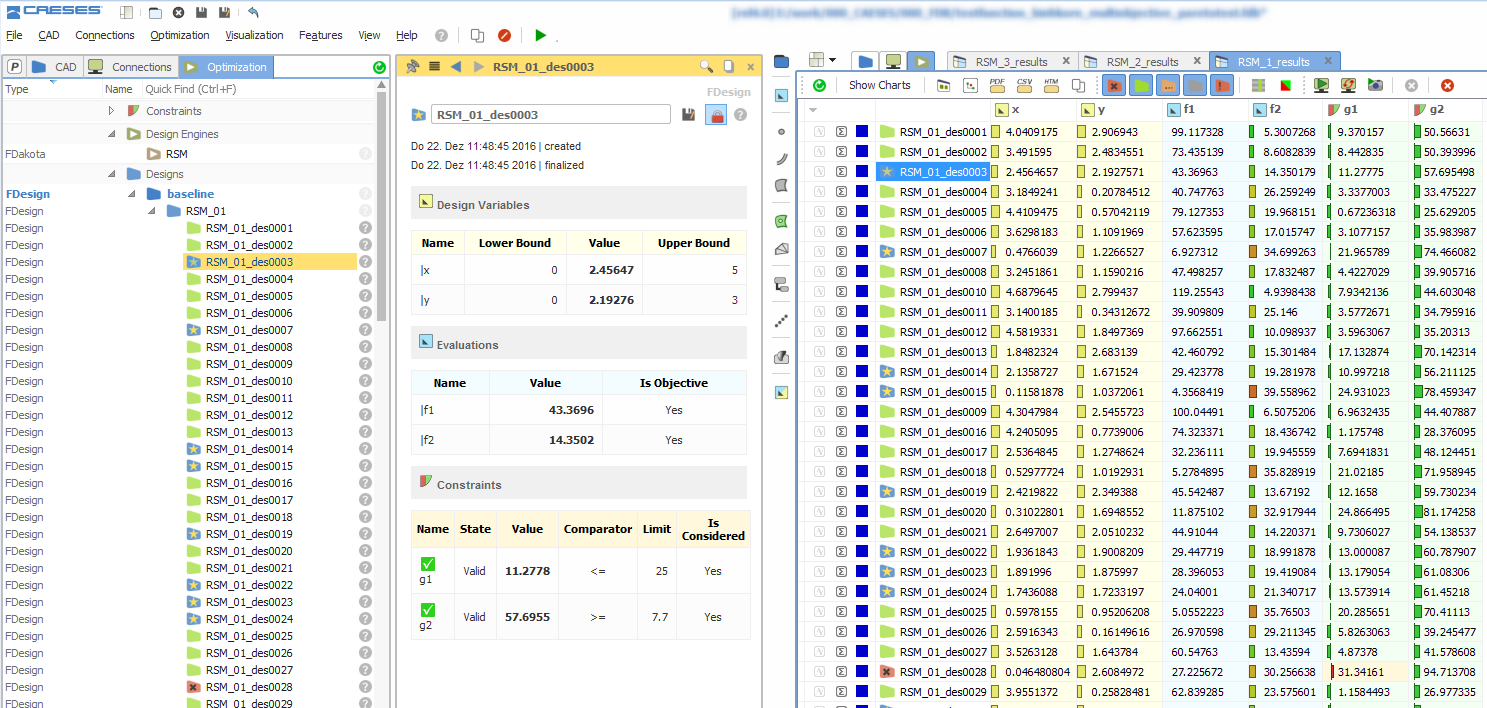
When running a design engine in CAESES®, a table shows up which gives you the current status including design variable values and objective functions. The best design candidates receive a dedicated icon (colored blue with a star) for a quick visual identification in the tree and in the table.
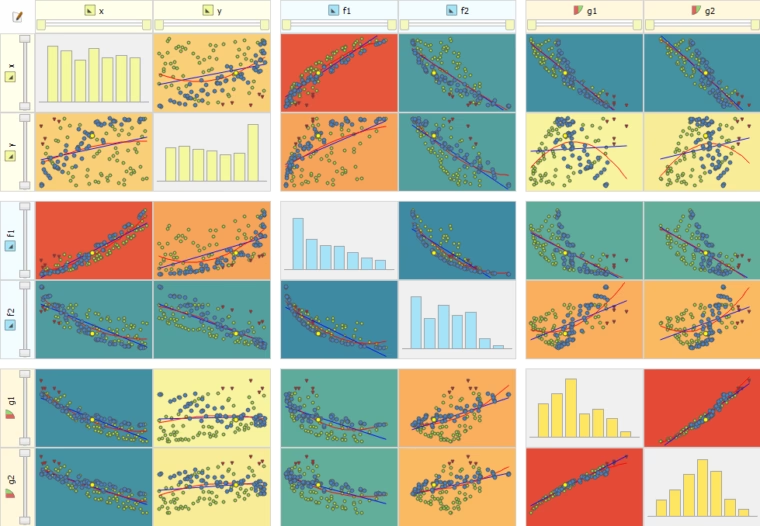
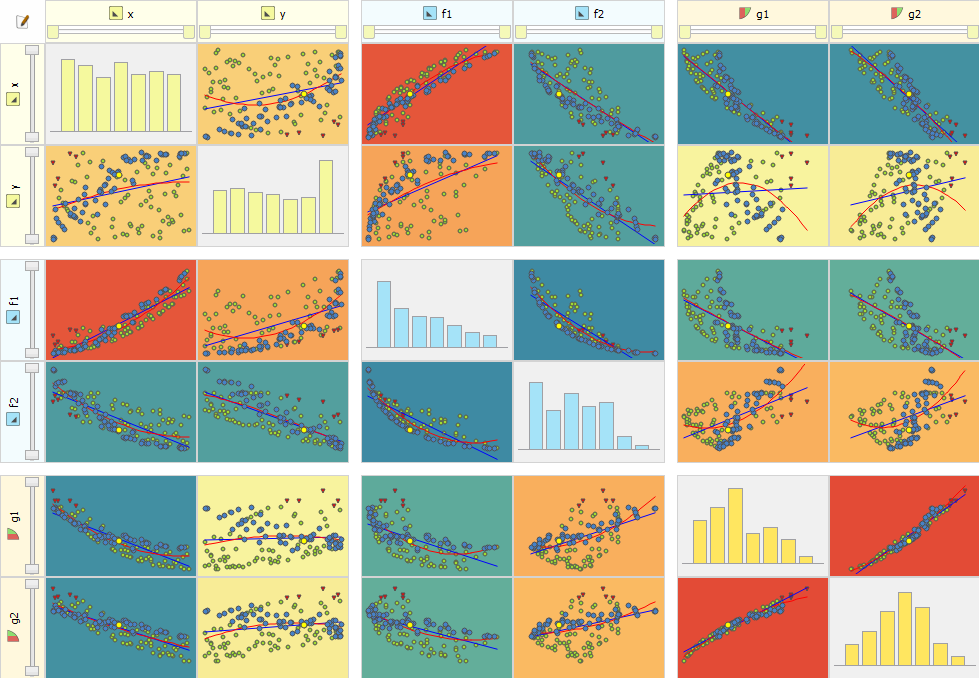
In the upper left of the table you can find a button for activating the 2D charts. This widget supports you in finding correlations and trends as well as detecting relevant design variables in your engineering problem.
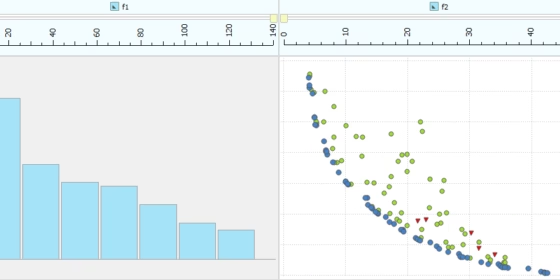
Finally, when considering several competing objective functions, you can also visualize the Pareto Front. In the screenshot below, the blue dots indicate the optimum design candidates. The green ones are valid designs, and the red ones are designs that violate some of the constraints:
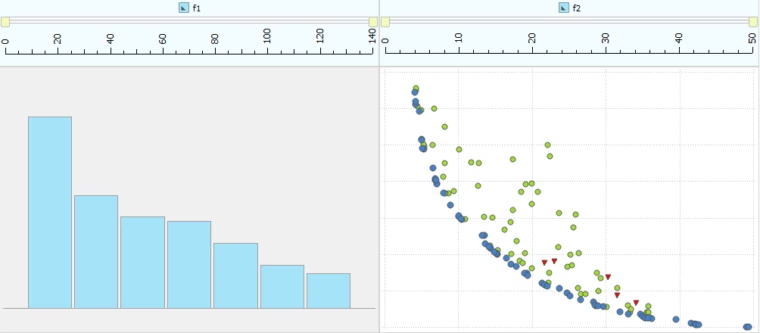
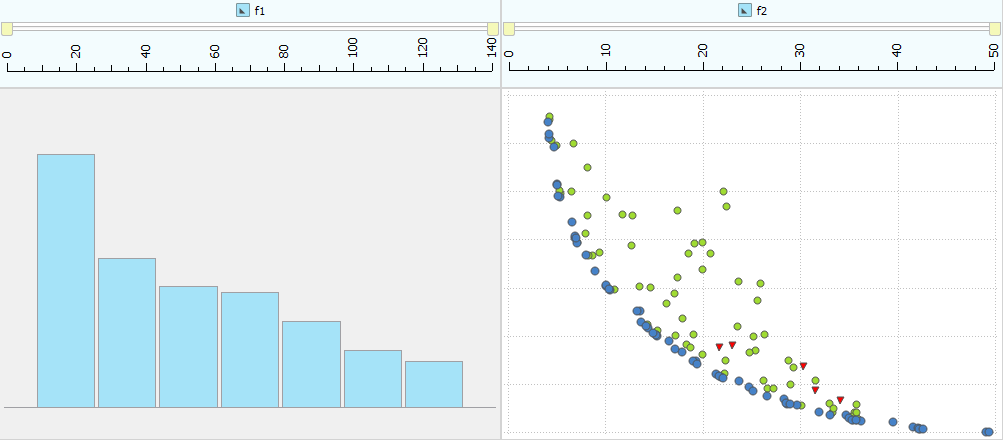
Pareto Front visualization for multi-objective optimization tasks
More Information
The interface to Dakota as well as the 2D charts are part of the AdvancedOpt add-on of CAESES®. Let us know if you want to have more information about it — don’t hesitate to drop us a line :-) Finally, check out a related blog post that shows how to create response surfaces in 4 easy steps without using design engines.